
Intro:
Welcome to our new project, understanding and playing with geometry and magnets, and some art. Ready to think? Ready to do? Ready to be creative? Well then let’s go!

Image source ayshabilgrami.tumblr.com
Curricular goals of this project:
Demonstrate an understanding of angles, including acute, right, obtuse, straight and reflex, by:
- drawing •
- replicating and constructing •
- bisecting •
- solving problems. [C, ME, PS, T, V]
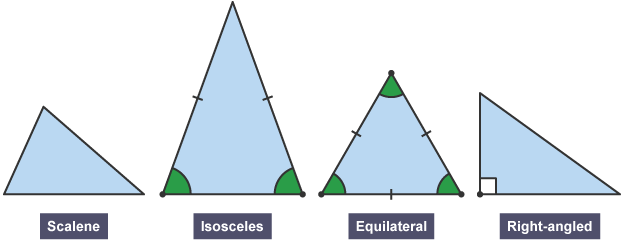
Image source http://www.bbc.co.uk/education/guides/z9fg4wx/revision/4
Big idea – varying the transversal allows us to notice angle relationships
Geometry and measurement: spatial relationships can be described, measured and compared.
- Use tools to analyse relationships and test conjectures (ruler, compass, protractor)
- Visualise to explore and illustrate math concepts and relationships (create a technically correct (angles) compass rose on paper).
- Connect math concepts to each other and to other areas and personal interests (create a technically correct, personal and artistic representation of a compass rose)
- Reasoning and logic – use the finished compass rose (after providing a magnet) for an orienteering activity.
The history of the Compass
The earliest compasses were most likely invented by the Chinese in around 1050 BCE.
They were created first for the purposes of spiritual life or developing a feng shui environment and then later used for navigation. It is disputed whether other cultures, such as some Mesoamerican societies, may have developed the idea for the magnetized compass first, also in accordance for spiritual aligning and not navigation.
Compasses were originally developed when lodestones, a mineral that has naturally magnetized iron ore, were suspended above a board with the ability to pivot and turn. It was discovered that the stones would always point in the same direction, and align themselves with the north/south axis of the earth.
(Text source https://www.thoughtco.com/the-compass-instrument-1435002)
Compass Rose History
Image source https-::www.pinterest.com:pin:491385009316784240:
It is not known exactly where or when the formal magnetic compass originated. However, what little, unclear evidence has been found indicates the compass was refined in Italy circa 1200AD. Italy is known for its grand maritime achievements that made them a navigational superpower.
It is believed Flavio Gioia first invented the refined compass, and a monument has been erected in Almafi Italy to honor his invention. The magnetic compass was probably developed by combining the wind rose and the lodestone. From this device it is supposed the compass rose evolved. A wind rose was glued to the top of a lodestone and placed in a covered container of water. Later, oils were used instead of water to stabilize the compass disk from erratic movement. Then it was found you could magnetize needles and glue them to the bottom of the disk. These needles had to be re-magnetized periodically to maintain a sufficient level of magnetism.
Uses
Like the wind rose, the compass rose was coincidentally designed in a fashion that resembled the rose flower. It helped to orient a map in the proper reading direction and gave the relative directions for certain points on the chart.
Before compass roses were used on maps, lines were drawn from central points. These lines were hard to follow since there were usually many of these lines intersecting each other on one map. The rose design was typically drawn in a way that made it easier to follow the directional lines.
Having good maps that were easier to read and which were developed using the magnetic compass made it much more efficient to trade for goods in far away lands and over the open seas. Direct routes could be established, and navigation in bad weather enabled transportation to take place year round instead of only on fair weather days during the warmer seasons.
Image source http://www.compassrosegeocoin.com/
About the compass rose design
The four main points (cardinal directions) of the compass were derived from the wind rose: North, East, South, and West. This is also where the four half points originated (ordinal directions). Later, more points were developed to gain more precise bearings, until finally 32 points in total were used. Reciting all 32 points of the compass is called “boxing the compass”. Some believe the numbers of the points start at North; however, it actually starts at East. This is because in relation to Western Europe, Jerusalem was in the east and therefore East was considered the primary direction.
The Flour de Lys is primarily used to indicate north. It was typically made in a very elaborate style and prominently placed so it could easily be distinguished from the other directions during low lighting environments, and ensured maps were oriented correctly when being used.
The Fleur-de-lys is an old symbol with many meanings. It goes back 1000’s of years and has been used by many different cultures. It is a symbol that continues to be used through out the world today
What is the Fleur-de-lys?
Fleur-de-lys is a French term and means Flower of the Lily.
Image source http-::www.tameside.gov.uk:museumsgalleries:mom:objectfocus:fleurdelysRed, blue, black, and green were the most common colors used in the compass rose. For the times, these colors were the easiest to distinguish in low light situations when using oil lamps and candles. (Text source http://www.compassrosegeocoin.com)


For a really detailed article with beautiful images click here
Examples:
There are a whole whack of images on Google
Here are some that I like for various reasons:

Image source https-::www.pinterest.com:pin:32158584817742947:

Image source https-::www.pinterest.com:fencerscott:tattoo-ideas:?lp=true

Image source http-::www.imgrum.org:media:1036789482163275057_2136628328

Image source http://www.johncoulthart.com/feuilleton/2011/08/26/compass-roses/

Image source http-::thecompasscompany.com:32poofco.html

Image source https-::www.dreamstime.com:stock-photography-navigators-compass-rose-image6674732
Image source http-::www.istockphoto.com:dk:vector:sailboat-compass-rose-gm165064949-3353609
Image source http-::thecompasscompany.com:32poofco.html
The math behind the compass rose:
(Text source http://www.mathsisfun.com/measure/compass-north-south-east-west.html)
Compass Bearings
Image source http://www.mathsisfun.com/measure/compass-north-south-east-west.html
A Compass Bearing tells us Direction
The 4 main directions are North, South, East and West (going clockwise they are NESW).
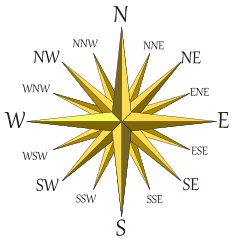
*Look at the In between bearings! ssw. wsw etc.
Example: in the morning there was a strong North wind, but later it swung around to the North-East
(Image source http://www.mathsisfun.com/measure/compass-north-south-east-west.html
Three-Figure Bearings
Three-figure bearings are an alternative to compass bearings that are much more precise. They are measured in a special way:
- Start measuring from the direction North
- Measure clockwise
- Give the bearing using three figures (or more than three if there’s a decimal)
Airline pilots and ships’ helmsmen use three-figure bearings so that they can point their craft in exactly the right direction to safely reach their destination.

Examples
The four main compass bearings (North, East, South and West) are multiples of 90°:
Image source (Image and text source http://www.mathsisfun.com/measure/compass-north-south-east-west.html
Notice that east, for example, is 090° rather than 90° because it is given as three figures.
The advantage of three-figure bearings is that they describe any direction uniquely:
Image source (Image and text source http://www.mathsisfun.com/measure/compass-north-south-east-west.html
Note that the last one has four figures (three in front of the decimal point and one after) but it is still a “three-figure bearing”, the .4 just gives more accuracy.


Example: South-West is 225 (in other words 225° clockwise from North)
There are more examples and activities on the Compass at the Math is Fun site
Activitie:
A Walk in the Desert
An interesting phenomenon is that there are two North poles!!! True vs. magnetic north.
If curious click here for more information
The Project:
Learning the math!
Making the Compass Rose.
- Rose Each student will make a working compass, surrounded by a compass Rose. Materials: Pin, container, and magnets, glycerol.
- The design for the compass Rose must be a personal design that somehow relates to you! Each student will get a 4×7″ wooden panel, paints and, Pencil crayons. First, plan your design out. Then using the compass and ruler lay out your cardinal points and then Lable the point is some way. Put text at the bottom for fun!
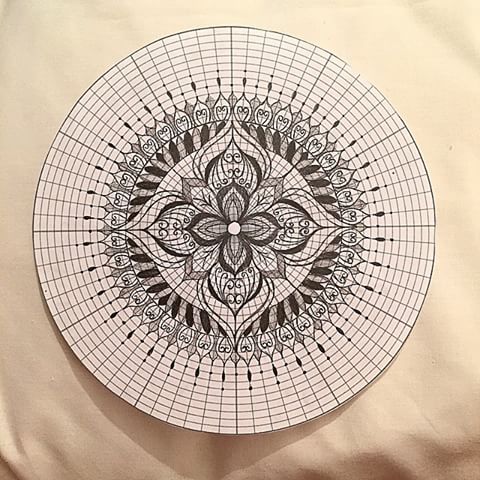
Image source http-::www.imgrum.org:user:cathyesnelltattoo
- The 32 Points of the Compass
Point Direction Azimuth
0 North 0° – 0′
1 N by E 11° – 15′
2 NNE 22° – 30′
3 NE by N 33° – 45′
4 NE 45° – 0′
5 NE by E 56° – 15′
6 ENE 67° – 30′
7 E by N 78° – 45′
8 East 90° – 0′
9 E by S 101° – 15′
10 ESE 112° – 30′
11 SE by E 123° – 45′
12 SE 135° – 0′
13 SE by S 146° – 15′
14 SSE 157° – 30′
15 S by E 168° – 45′
Point Direction Azimuth
16 South 180° – 0′
17 S by W 191° – 15′
18 SSW 202° – 30′
19 SW by S 213° – 45′
20 SW 225° – 0′
21 SW by W 236° – 15′
22 WSW 247° – 30′
23 W by S 258° – 45′
24 West 270° – 0′
25 W by N 281° – 15′
26 WNW 292° – 30′
27 NW by W 303° – 45′
28 NW 315° – 0′
29 NW by N 326° – 15′
30 NNW 337° – 30′
31 N by W 348° – 45′
Text source http://www.gisnet.com/notebook/comprose.phpPoint Direction Azimuth:This is the direction of a celestial object, measured clockwise around the observer’s horizon from north. So an object due north has an azimuth of 0°, one due east 90°, south 180° and west 270°. Azimuth and altitude are usually used together to give the direction of an object in the topocentric coordinate system.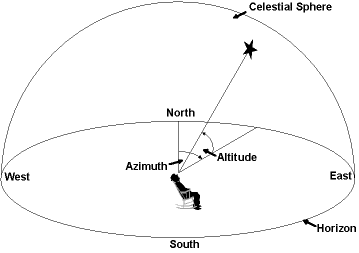 Text source www.heavens-above.com
Making the Compass.
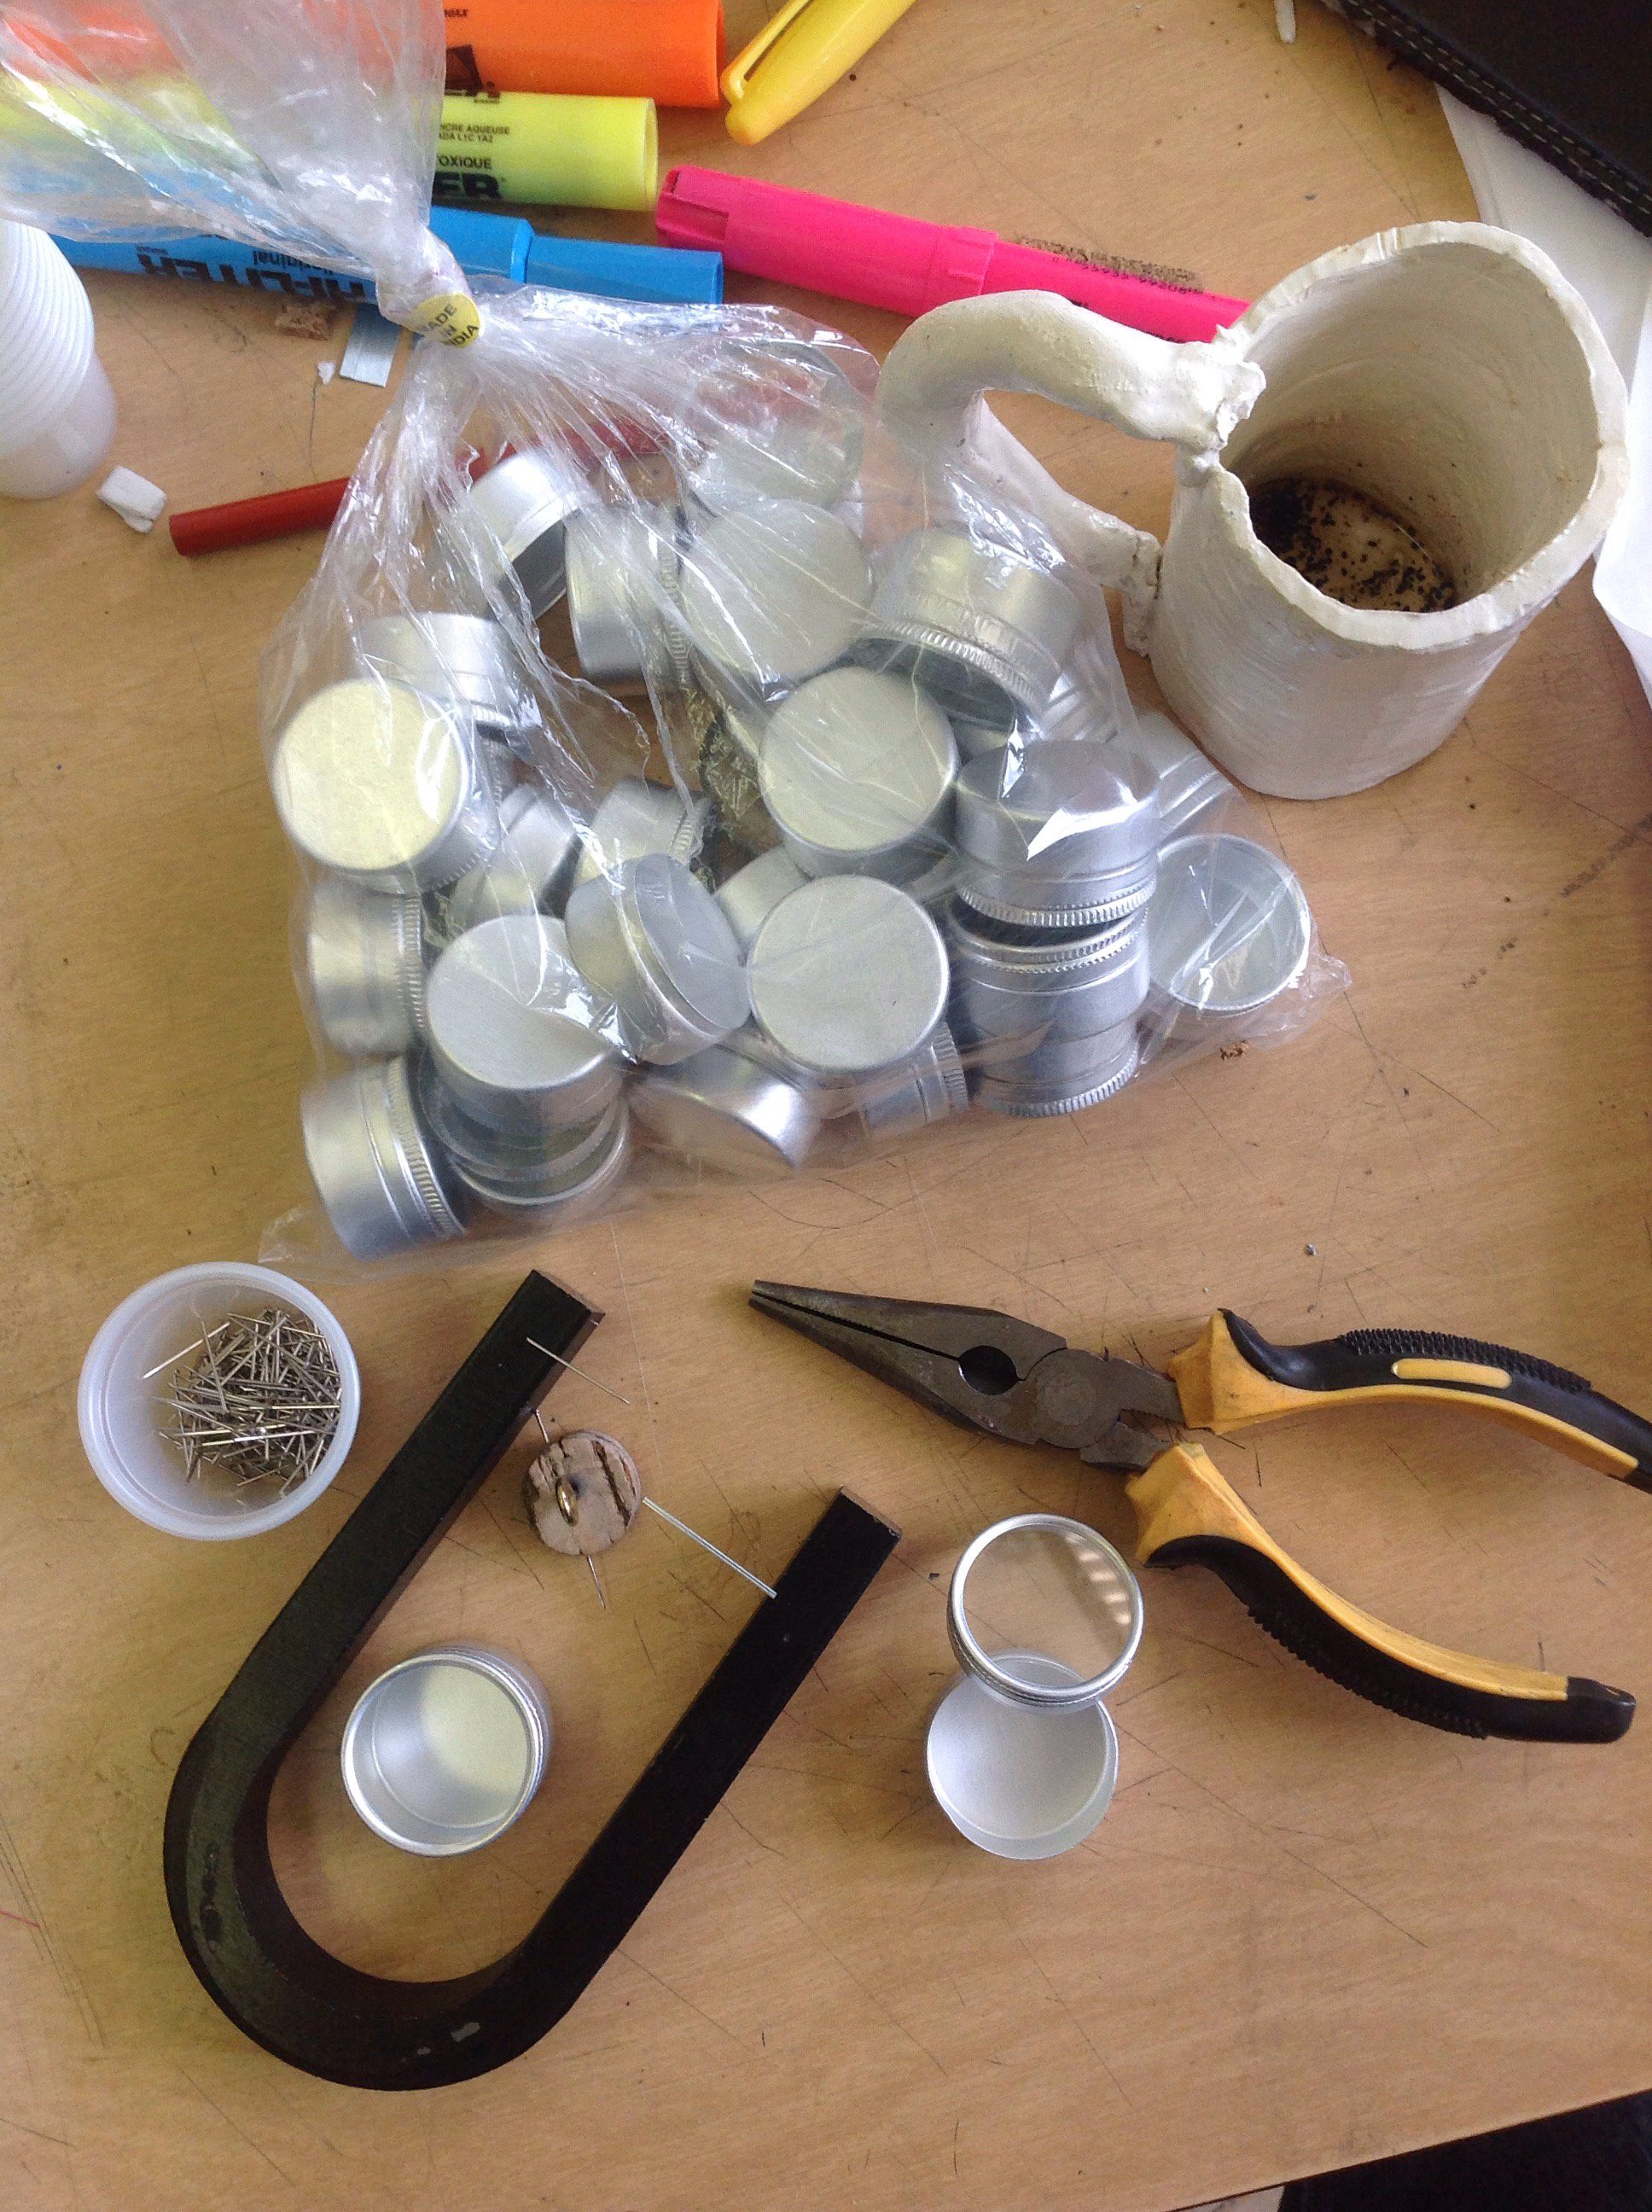
- First get a small liquid tight container.
- Magnetized steel pin by stroking it in the same direction in a magnet about 20 times.
- Stick magnetized pin through a small piece of cork or another material that floats.
- Pour Glyceral into container- about 1/2 full/
- Place pin/cork in the middle of the container. Make sure the pin does indeed align itself with magnetic North.
- If you want to seal the container, use a bead of silicon.

We tried Oil, water, and Glycerol. Glycerol was the best.

Simple prototype and testing
Putting it all together
- Place container on the compass rose. wait for the pin to align itself with North and Try it out!
- Walk 10 paces to the west.
- Realign to north and then walk 6 paces South
- Realign to north and then walk 15 paces to the East
- Realign to north and then walk 10 North
- Then walk 5.5 pace South-West… Where are you?
Evaluation criteria:
AW Math 10 Compass Rose Project Rubric
| Criteria | Emerging (2) | Developing (3) | Proficient (4) | Extending (5) | Mark value |
| Accuracy of labeling | Cardinal directions (NESW) shown | Cardinal directions shown and lab eled | Cardinal and intermediate directions shown | Cardinal and intermediate shown and labeled | 5 |
| Accuracy of measuring (protractor) | Cardinal directions not exactly 90° from each other | Cardinal directions exactly 90° from each other | Cardinal and intermediate directions not exactly 45° from each other | Cardinal and intermediate directions exactly 45° from each other | 5 |
| Design | 5 | ||||
| Statement of personal connection to your compass rose | 5 | ||||
| Connection to Real Life Written Piece | 10 | ||||
| Total | 30 |
Students self-assess each criterion first then teacher assesses.
Statement of personal connection (2-3 sentences) – how is this design connected to your personally? (5 marks)
Connection to real life – Describe three historical uses of the compass rose and three benefits to modern day life. Is the compass rose still useful in daily life? Why or why not? (10 marks)
Student work:
